We know parking bays come in all shapes and sizes, and that many of them deserve an independently designed string (with cross sections attached to the string to describe the kerb shape of the parking bay). For those parking/bus or widening bays that can be readily described with cross section edits, we’ve got you covered with this new variation.
Included in the Civil Site Design V26 release, the Insert – Add Parking Bay variation attaches a parking bay and dish to the invert of your kerb with the following controls:
- Set the width and height of the dish to add through the parking bay
- Set the dimensions of the parking bay – width, taper lengths and bay length
- Pick the type of tapers you want: linear, bay taper (⅓ curve, ⅓ tangent, ⅓ curve) or parabolic (back-to-back curves). Or, pick an alignment
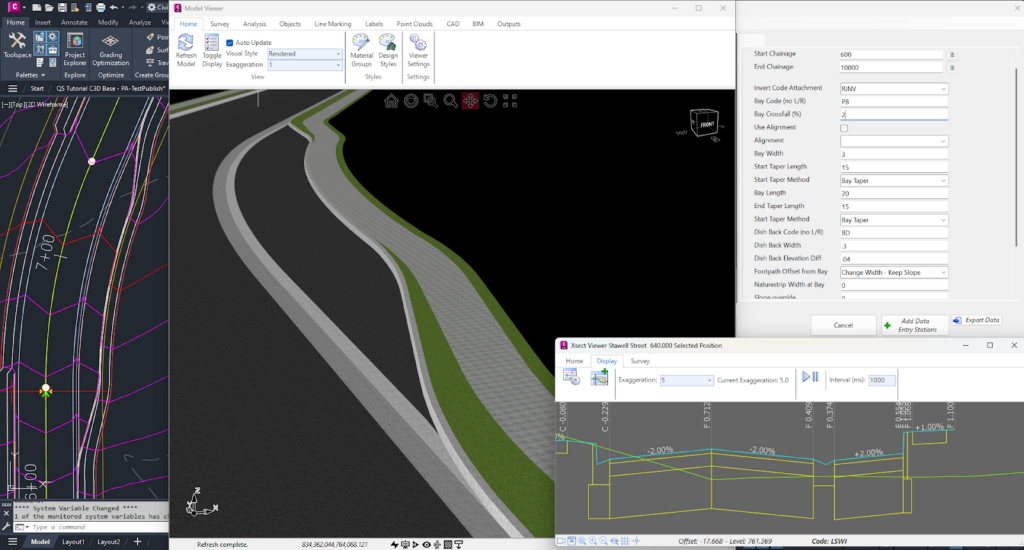
- Set the footpath (sidewalk) option from:
– Keep the original offset and either elevation or slope
– Transition offset to match back of parking bay
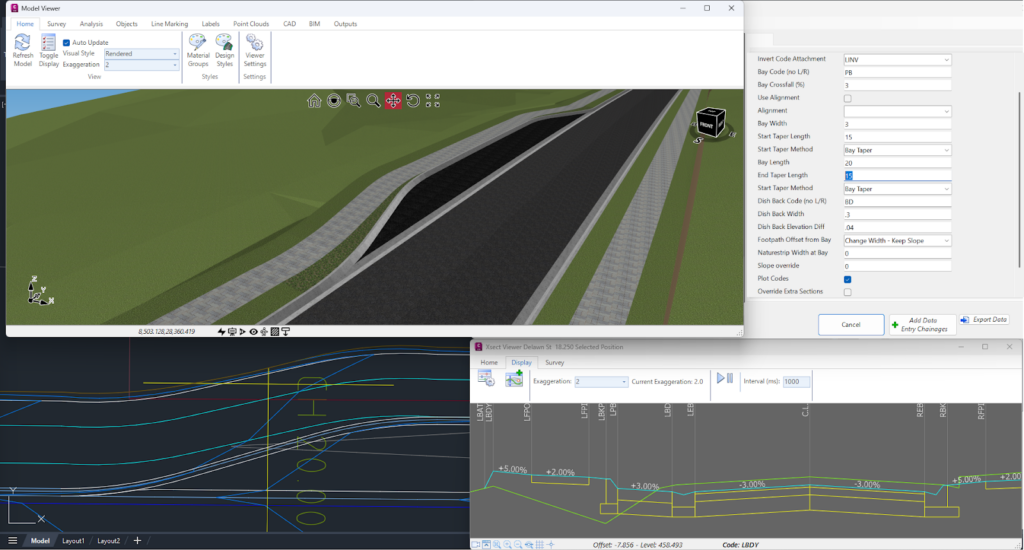
The software adds in extra sections to finely match up the start of the kerb to the dish back. Don’t forget to press the Recalculate button on the Design Data form to push those extra sections in.
The dish forms against the parking bay taper up until it reaches the width you input, so you get a smooth transition from kerb to dish and kerb.
This variation does assume a few things:
- You are adding a dish (you can put in zero for the width to simulate no dish) and attaching to the lip/invert of kerb
- The kerb consists of four codes (lip code, two codes between and a back of kerb code)
- The existing back of kerb code (eg: BK code) is removed and replaced with a code named BKP. We do this so that it is easier to manage the subgrade in a single template (if we keep the BK code, then the software assumes a ‘kerb’ type subgrade from the edge of road right through the parking bay to the back of kerb code)
- The parking bay taper begins at the Start Chainage you pick – you need to have an End Chainage that matches or is beyond the parking bay extents
If you are exploring the variations and hunting for the new parking bay variation, note that we’ve enabled a (completelyuser controlled) folder structure for grouping your variations (Read the Blog Article here). When you are looking in the Custom Variations list, you will find the Insert – Parking Bay with Dish variation in the Task_Specific_Variations folder (if you are in the USA, look in the Pavement folder).
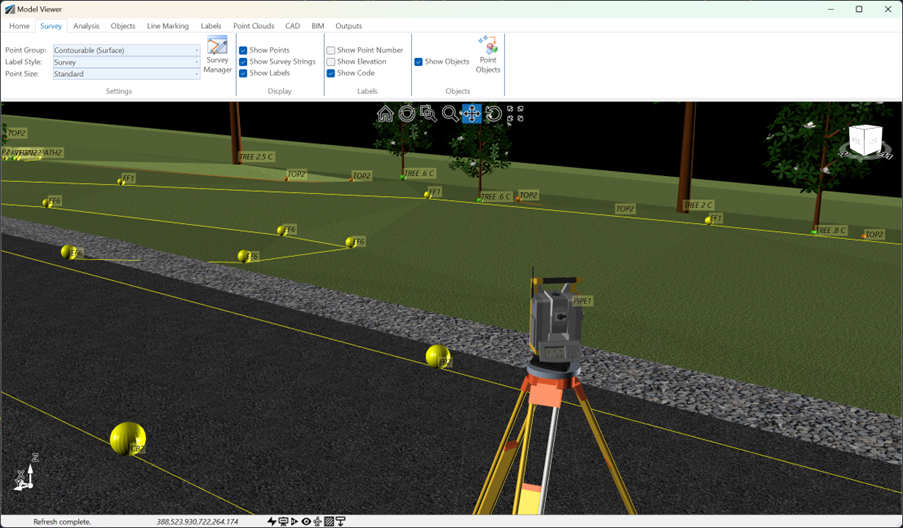
See how Civil Site Design efficiently incorporates and displays survey data, specifically cogo points and survey strings, within your design framework. This article explores this through the lens of a rural road project, demonstrating how cogo points and survey strings from the topographical survey are seamlessly integrated and visualised in Civil Site Design's Cross Section Viewer, VGE (Vertical Grading Editor), and 3D viewer (Model Viewer).
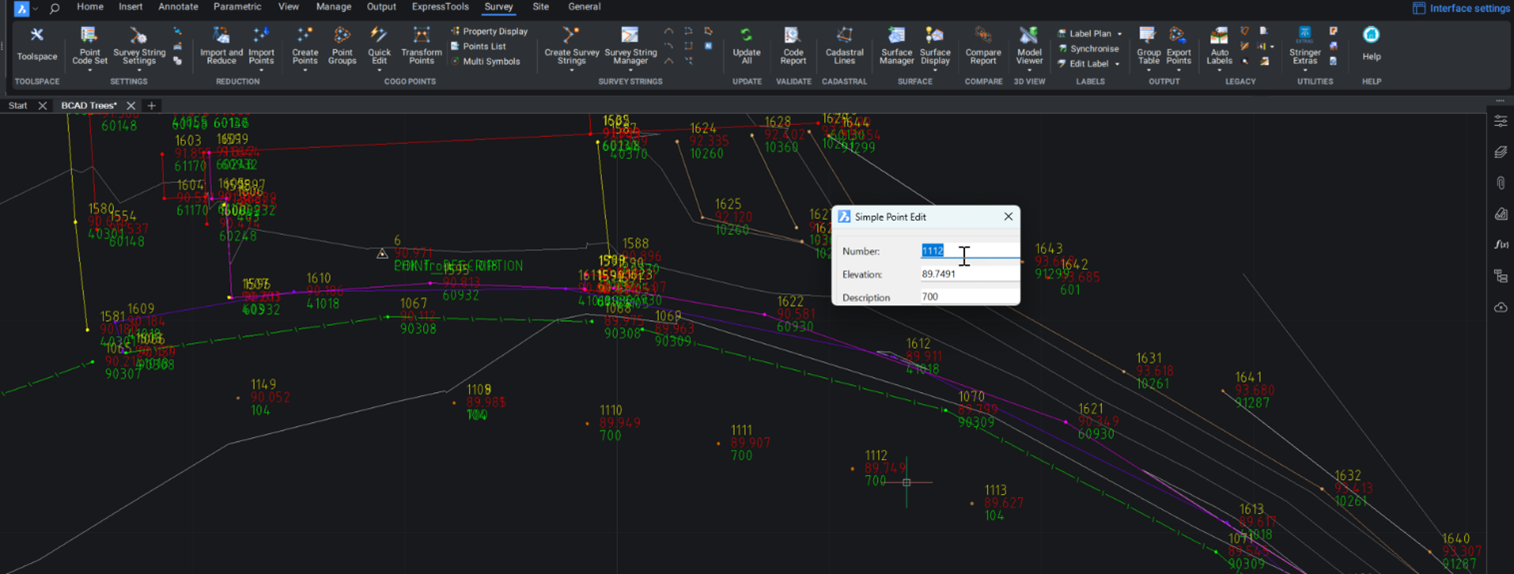
Stringer Topo provides multiple ways for customers to interact with and edit the points and survey strings that define your feature surveys. Using the Survey String Manager, you can select any point or survey string to view properties, and edit the selected object by right click or from the contextual ribbon. The Stringer Toolspace operates as a standard CAD palette, for you to create and edit points, point groups, survey strings and surfaces.
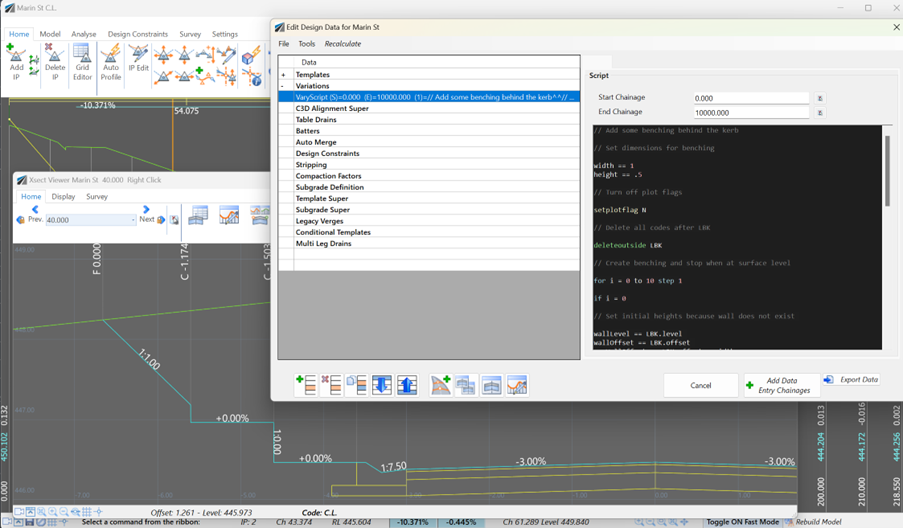
Unlock advanced cross-section editing in Civil Site Design with ScriptX, a user-friendly scripting tool for precision and customization. Easily integrate your scripts into the design process, and collaborate effortlessly with a shared library of scripts. This article will explore ScriptX's capabilities and provide download sample scripts.
At times you may need to move your standalone Civil Site Design or Stringer license due to hardware failure, formatting of a workstation (PC) or moving to another PC. Here are the instructions on how to complete this process both if the license is accessible or inaccessible.