A major part of your design process is to identify low points and to either redesign to move/remove them or to include stormwater infrastructure to capture and redirect the flows. Previously you have relied upon the contour data, adding water drops and reviewing your vertical design and cross sections to determine low point locations.
Now, you can create CSA COGO points at both high and low points by picking a surface model for your design and also picking the Code/s to analyse for high/low points. These are COGO points, so you can name them, include them in Point Groups, use them to create a surface, as a reference for adding structures and export them to file.
Access and Operation
You’ll find this new tool in the Roads Ribbon tab as well as in the CSD Toolspace (right click on Models).

You select the Model to add high/low points on and the Code/s to analyse. For the output, you set up the COGO point code and display style.
Before you hit the Process button, use the tick boxes to decide whether to add COGO points at the low points, high points or both.
The software ‘walks’ along each of Code you have selected, extracts elevations at each sampled section, and determines the low point/s. The Tolerance setting can be used to minimise low point detection when elevation differences are small between sections.
Once you press the Process button the COGO Points are created:

You can check at a glance whether there are low points where you don’t expect, including low points in kerb returns you may wish to review.
Recalculating Positions
If you make design changes and wish to review the high/low point positions, delete the points and recreate. You can delete them directly from the drawing, or we’ve added a Point Groups button on the form to open to the list of created CSA COGO points – you can highlight all in there, then click on the Options button, then Delete.
Note to Civil 3D Users
These COGO points are managed directly by Stringer/Civil Site Design – they are not Civil 3D COGO points. If you want to play around with how they look, to export them or to mass delete them, we recommend restarting this command and clicking on the Point Group button to manage them from there.
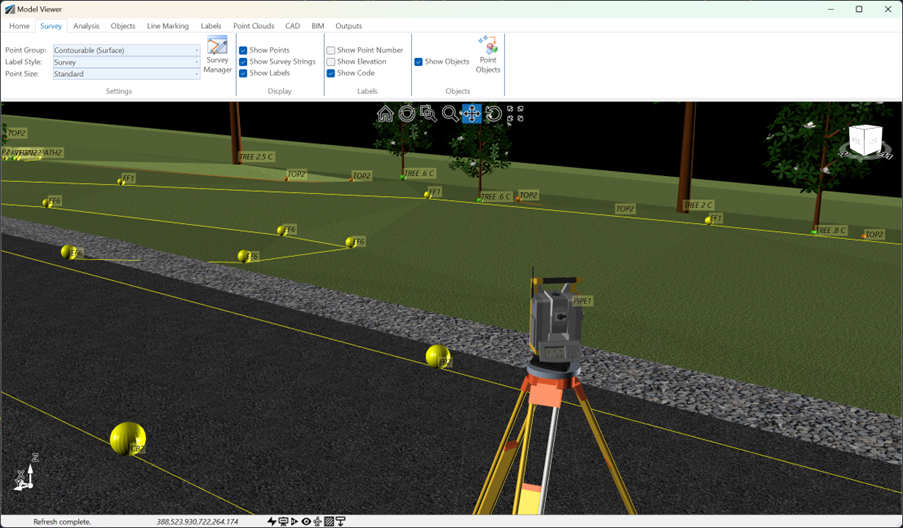
See how Civil Site Design efficiently incorporates and displays survey data, specifically cogo points and survey strings, within your design framework. This article explores this through the lens of a rural road project, demonstrating how cogo points and survey strings from the topographical survey are seamlessly integrated and visualised in Civil Site Design's Cross Section Viewer, VGE (Vertical Grading Editor), and 3D viewer (Model Viewer).
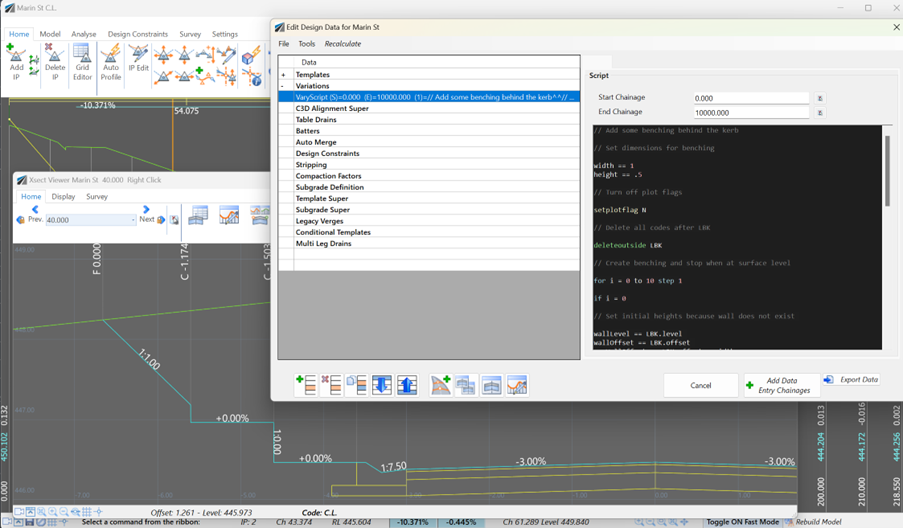
Unlock advanced cross-section editing in Civil Site Design with ScriptX, a user-friendly scripting tool for precision and customization. Easily integrate your scripts into the design process, and collaborate effortlessly with a shared library of scripts. This article will explore ScriptX's capabilities and provide download sample scripts.
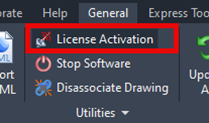
At times you may need to move your standalone Civil Site Design or Stringer license due to hardware failure, formatting of a workstation (PC) or moving to another PC. Here are the instructions on how to complete this process both if the license is accessible or inaccessible.
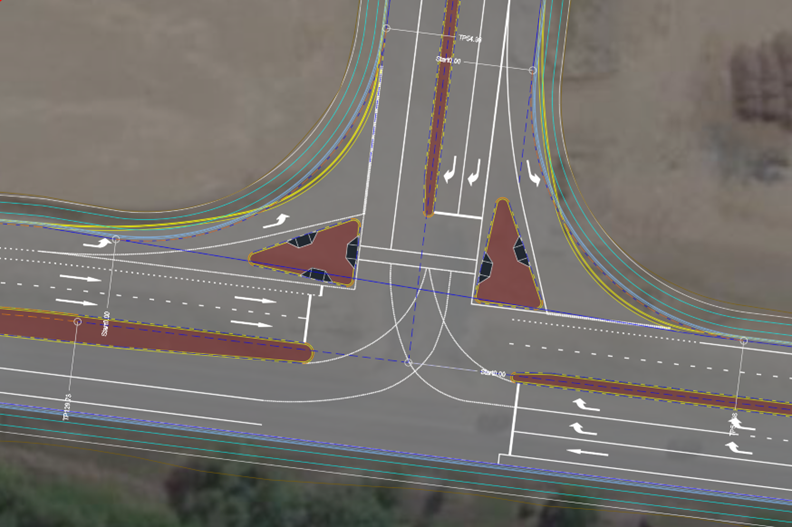
Revolutionise your Civil Site Design with Project Assist: Automating medians and splitter islands effortlessly. This AI-powered tool streamlines island integration by detecting alignments, automatically trimming road strings, and enhancing precision with minimal manual input.